
Sep 13
Ripping CDs on Ubuntu
Coming from Window, audiophile users probably miss EAC (exact audio copy) as a reliable application to rip CDs as accurate as possible. Others relied on dbpowerAmp and it's network of CD track checksums to verify what has been read from a CD by the disk drive.
On Ubuntu Linux, mostly Rhythmbox or banshee will take over as soon as you insert CD into the drive but as good as they are to do quick copies of your audio, paranoid users might miss the verbose error checking and transparency of the process they know from EAC etc.
Extracting with cdparanoia on CLI
After shutting down the nice GUIs and looking around the Linux world of CLI tools, most audio enthusiast will come to cdparanoia, a helpful tool that tries really hard to exactly copy what is on a CD.
A common cdparanoia CLI workflow would be to:
1. Get basic info about where your drive is mounted and what's on the CD in it with: cdparanoia -vsQ
2. Make a target directory for the extracted tracks: mkdir SomeCD && cd SomeCD
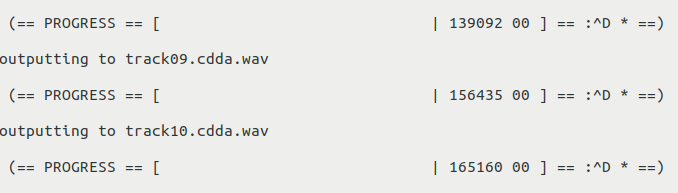
3. Extract the whole disk with default parameters: cdparanoia -B
A common workflow to convert the extracted .wav files to flac would be:
1. Convert all the extracted .wav files to .flac and delete the origin files: flac --best --delete-input-file -w *.wav
If you prefer GUI tools that wrap cdparanoia, take a look at this list.
grip (only available via ppa as of 12.04) is one frontend, ripperx another
Example workflow with RipperX GUI
One workflow utilising ripperX as frontend would be:
1. Make sure ripperX is installed: sudo apt-get install ripperx
2. Fire it up, and do you first config, you probably want to make sure cdparanoia is configured as backend, in General check "Keep WAV files"
3. Adapt file naming to your liking: go to Config > General and Config > Files, one sane string is "%a - %# - %s" (Artist - TrackNo - Song), all strings here
4. Select "Rip to WAV", click "CDDB" to populate track names
5. By default, ripperX will create a subdir for you
6. Note that applying accents in the track names and cd title doesn't work, utf8 support seems broken
7. Note that ripping to WAV will result in named files but without any ID3 or similar tags
8. Click "GO"
Metadata can then be added by utilizing GUI tools like MusicBrainz's picard or a slew of CLI tools or scripting...
Converting WAVs to MP3s, WAVs to MP3s, FLACs to M4A
Best way to do it is via CLI with lame. This page has a good section about quality settings, if you are unsure how vbr vs. fixed rate mp3s compare: hydrogenaudio recommendations.
By default, lame is a per-file tool, so it can't process an entire directory of mp3s. However, with a bit of shell scripting you can do it:
for f in *.wav; do lame -V 2 "$f" "${f%.wav}.mp3"; doneThis encodes all WAVs with VBR setting V2 (averaging to 190kbps, roughly) to mp3s.
No that lame does read-in FLACs as well, just exchange *.wv with *.flac.
Another downside is that lame won't preserve ID3v2 tags or any other tag in FLACs or WAVS and won't migrate them into the created output mp3. I don't know why.
Or convert the resulting FLAC files to .m4a files (aac in an MPEG-4 container, as bare aac alone has no facility to store metadata tags):
$ for f in *.flac; do ffmpeg -i "$f" -strict -2 "${f%.flac}.m4a"; doneNot that on older Ubuntu system you would commonly switch ffmpeg for avconv. avconv is not avilable on Ubuntu 20.04 onwards - use ffmpeg instead.
Batch editing filenames, changing ID3 tags, fetching metadata
With CDDB being mostly dead and no servers reachable, you probably have to use a semi-automated workflow of looking up disc information and attaching it to files.
I've found oddly named ex falso from the quodlibet package to be the only usable solution. Via a plugin, which has to be activated first, you can look up disc metadata from MusicBrainz and apply it to multiple files at one, rename files accordingly, etc.
Read a CD's CDTEXT data on CLI
On Ubuntu Linux there are some tools that do read CD TEXT. If you don't know: CDTEXT is a feature where CD-Players will show the actual title of a played back track, it's embedded into the CDDA audio stream.
First, find the device path of your CDROM drive, with $ cdparanoia -vsQ. In my exmpale it turned out to be /dev/sr0. Then issue this command:
$ cdda2wav -D /dev/sr0 -JSwitch -D ist the drive path, switch -J is for "output info only". This will then dump CDTEXT, print ISRC numbers etc.
SCSI cdparanoia problems solved
When I tried using cdparanoid, I stumbled over my exotic cdrom drive setup. I've got my drive attached to the box via an IDE to USB adaptor, as the drive resides in an external box. This leads to the drive being recognized by the system as /dev/sr0.
When cdparanoia does it's extensive drive lookups, it always oversaw this location and told me
No cdrom drives accessible to user found.
Very annoying!
Further, simply mounting the drive in one of cdparanoia's known locations didn't help either as you can't mount a drive with an audio CD - there is no real filesystem on it - and mount will complain.
The solution is to creat a link to this "non-standard" CDROM/DVDROM drive location with
sudo ln -sf /dev/sr0 /dev/cdrom
After that you can use the above workflow to extract audio.